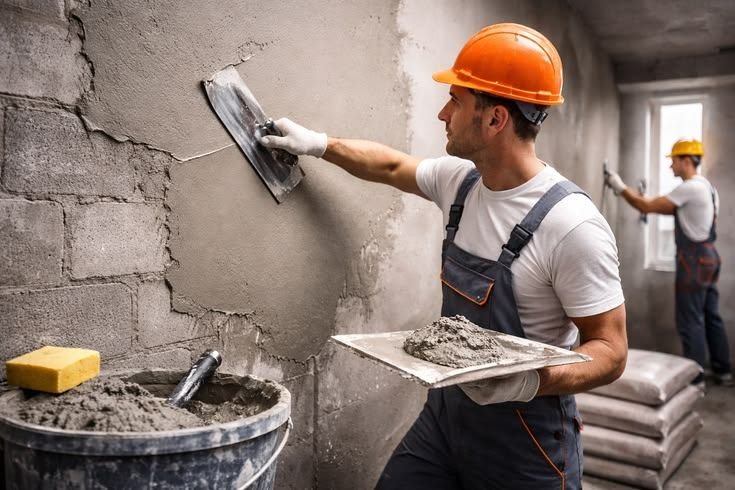
Plastering Works in Residential Construction: Key Steps and Quality Checks
Plastering transforms unfinished blockwork into level surfaces ready for paint, tiles and other finishes. This guide explains the main plastering stages, preparation requirements and common quality issues in residential construction.
After blockwork and the required concealed MEP services are completed, plastering becomes one of the key stages of interior finishing.
Plaster is not simply a cosmetic layer. Proper plastering creates an even surface for later finishes, protects the underlying masonry and helps establish the final alignment of walls, openings and corners.
The exact plaster system, mix, thickness and application method must always follow the project specification and the selected manufacturer's requirements.
What Is Plastering?
Plastering is the application of a suitable plaster or render system over blockwork, masonry, concrete or another approved substrate to create a continuous finished surface.
Depending on the project and location, cement-based or gypsum-based systems may be used. The selected product must be compatible with the substrate and intended environment.
1. Complete MEP First Fix
Before plastering begins, concealed services inside the walls should be substantially completed.
These may include:
Electrical conduits and boxes.
Water pipes.
Drainage connections.
Air-conditioning services where applicable.
Data and communication conduits.
The positions of switches, sockets and other wall-mounted elements should be checked against architectural and MEP drawings before plaster covers the wall.
2. Inspect the Blockwork
The block walls should be inspected before application.
Check:
Wall alignment and verticality.
Door and window openings.
Damaged or incomplete blocks.
Mortar joints.
MEP openings and penetrations.
Interfaces between blockwork and structural concrete.
Correcting major wall problems before plastering is preferable to attempting to hide them with excessive plaster thickness.
3. Prepare the Surface
Good substrate preparation is essential for proper plaster performance.
Loose material, dust and contaminants should be removed. The substrate's suction and surface texture should also be considered.
British Gypsum, for example, recommends clean, reasonably dry and dust-free backgrounds and provides different preparation methods for high-suction or smooth, low-suction surfaces.
4. Install Beads and Establish Levels
Corner beads and stop beads may be installed where required to create clean edges and protect corners.
Plaster guides or screeds are also commonly established to control:
Wall level.
Verticality.
Plaster thickness.
Alignment around openings.
Accurate preparation at this stage has a major effect on the final appearance of the wall.
5. Mix and Apply the Plaster
The plaster is mixed according to the selected system and applied to the prepared substrate.
Application thickness should never be assumed to be the same for every product. Manufacturer guidance varies considerably depending on the material and background.
For example, British Gypsum specifies an 11 mm application for some backing plasters and requires thicker applications to be built up in controlled layers rather than one excessive coat.
6. Level and Finish the Surface
After application, the plaster is ruled and levelled using appropriate tools.
The objective is to produce a consistent surface with correctly formed corners and openings.
The required final texture depends on the next finish. A wall intended for painting may require a different final preparation from one receiving tiles or another covering.
7. Drying and Curing
The treatment after application depends on the plaster system.
Cement-based plaster relies on cement hydration and therefore requires appropriate curing conditions. Gypsum products follow different setting and drying procedures.
For this reason, site teams should follow the specified system rather than applying one curing method to every type of plaster.
Quality Checks Before Acceptance
Before approving plastering works, check:
Wall verticality.
Surface flatness.
Corners and edges.
Alignment around doors and windows.
Cracks or debonded areas.
Visible surface defects.
MEP box positions.
Required finish for the next trade.
As one example of a residential quality benchmark, NHBC guidance includes tolerances for the appearance and flatness of internal plastered surfaces.
Common Plastering Problems
Typical defects include:
Cracking: may result from movement, substrate conditions, inappropriate application or other construction factors.
Hollow or debonded plaster: may indicate poor adhesion between the plaster and substrate.
Uneven surfaces: often become more noticeable after lighting and painting are installed.
Poor corners and openings: can create problems later with doors, joinery, skirting and wall finishes.
Covering MEP points: incorrectly positioned or buried electrical boxes can create unnecessary rework.
What Comes After Plastering?
Depending on the project sequence, later works can include waterproofing in wet areas, floor screed, ceiling works, tiling, wall preparation and painting.
The plaster should reach the required condition for the next finish before subsequent materials are applied.
Conclusion
Plastering is a critical transition between rough construction and final interior finishes.
Successful plastering depends on three main factors: proper substrate preparation, correct application of the specified plaster system, and accurate quality control.
A well-executed plastering stage provides the foundation for better paint, tile, joinery and overall interior finishing quality.
References
British Gypsum — Plaster Systems: https://www.british-gypsum.com/systems/plaster-systems
British Gypsum — Thistle HardWall Installation: https://www.british-gypsum.com/installation/installation-guidance-and-support/installation-guides/thistle-hardwall-installation-instructions
British Gypsum — High Suction Backgrounds: https://www.british-gypsum.com/technical-support/self-help-tools/faqs/how-do-i-deal-high-suction-backgrounds
American Cement Association — Applications of Cement / Stucco: https://www.cement.org/cement-concrete/applications-of-cement/
NHBC Standards — Wall and Ceiling Finishes: https://nhbc-standards.co.uk/9-finishes/9-2-wall-and-ceiling-finishes/
Related articles

Key Construction Project Terms: Design, Pricing and Execution
Construction projects use a wide range of technical and commercial terms. This practical glossary explains common terminology used in design, tendering, pricing, contracting and site execution.
Read article →
Wall Painting Stages: From Surface Preparation to Final Coat
Good wall painting depends on much more than the final color. This guide explains the main painting stages after plastering, including surface preparation, putty, sanding, primer, paint coats and final inspection.
Read article →
Flooring Installation: Materials, Grout Joints and Floor Profiles
Proper flooring installation depends on more than the selected tile or stone. This guide explains substrate preparation, adhesives, grout, spacers, leveling systems, movement joints and transition profiles used in residential flooring.
Read article →