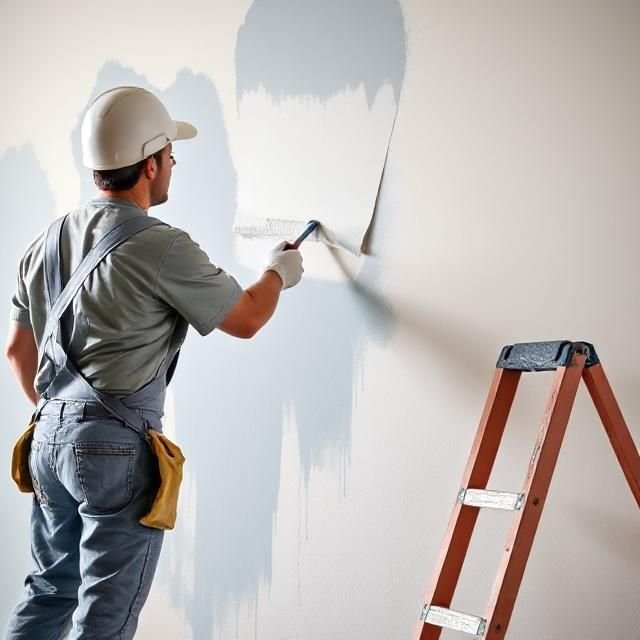
Wall Painting Stages: From Surface Preparation to Final Coat
Good wall painting depends on much more than the final color. This guide explains the main painting stages after plastering, including surface preparation, putty, sanding, primer, paint coats and final inspection.
Wall painting is one of the final stages that defines the appearance of an interior. However, achieving a smooth and consistent finish depends largely on what happens before the final paint coat is applied.
The exact preparation and coating system varies according to the substrate, selected paint, environmental conditions and manufacturer's specifications.
1. Inspecting the Plastered Wall
Before painting begins, the plastered surface should be inspected.
Check for:
Cracks.
Uneven areas.
Holes and surface defects.
Loose material.
Moisture or dampness.
Poorly finished corners.
Defects around electrical boxes and openings.
Paint should not be used to hide significant plaster defects. These should be repaired before the coating system begins.
2. Surface Preparation
Surface preparation is one of the most important stages of painting.
The wall should be clean, stable and suitable for the selected coating. Dust, grease, loose material and other contaminants can affect adhesion and final appearance.
Sherwin-Williams emphasizes that proper surface preparation is essential for paint performance and that surfaces should be clean, dry and sound before painting.
3. Wall Putty
Wall Putty or an appropriate filler is used where specified to correct minor surface imperfections and produce a smoother base.
Depending on the selected system, it may be applied in multiple thin layers rather than one excessively thick application.
Each layer should reach the condition required by the manufacturer before further work continues.
4. Sanding
After the putty or filler has dried, the surface is sanded to remove irregularities and create a smooth finish.
Particular attention should be given to:
Corners.
Areas around doors.
Electrical boxes.
Wall and ceiling junctions.
Surfaces receiving directional lighting.
Poor sanding may become clearly visible once the final paint and lighting are installed.
Dust should be removed after sanding before applying the next coating.
5. Primer
Primer prepares the substrate for the finishing paint.
Depending on the system, primer can help promote adhesion, create a more uniform surface and improve the performance of subsequent coats.
The primer should be selected according to the substrate and final paint rather than treating all walls with the same product.
6. First Paint Coat
After the primer is ready, the first coat of the selected finish paint can be applied.
Common application methods include:
Roller.
Brush.
Spray application where suitable.
The wall should then be inspected for visible defects that may require minor correction before the final coat.
7. Final Paint Coat
The final coat provides the intended color and appearance.
The number of coats and drying or recoating times should follow the manufacturer's product data rather than a fixed rule for every paint.
Final coats are often coordinated carefully with other finishing activities to minimize damage from ongoing construction work.
8. Choosing the Paint Finish
The sheen level affects both appearance and practical performance.
Common interior finishes include:
Matt / Flat: provides a low-reflection appearance and is commonly selected for ceilings and walls where a soft finish is desired.
Eggshell: offers a subtle sheen and is often used for interior walls.
Satin: has a more noticeable sheen and is commonly considered where easier cleaning is desirable.
Semi-Gloss / Gloss: produces greater reflection and is often used selectively on doors, trims or other architectural elements.
Actual performance varies by product, so the manufacturer's technical information should always be checked.
9. Protecting Other Finishes
During painting, completed elements should be protected, including:
Flooring and marble.
Doors.
Joinery.
Switches and sockets.
Glass.
Sanitary fixtures.
Metal profiles.
Good protection reduces cleaning and prevents permanent stains or damage.
10. Final Inspection
After completion, inspect the walls under normal project lighting.
Check for:
Uneven color.
Roller or brush marks.
Visible sanding defects.
Cracks.
Paint runs.
Poor edges.
Stains or contamination.
Differences in sheen.
Lighting is important because defects that appear minor during construction may become obvious after decorative and directional lighting is switched on.
Common Painting Mistakes
Typical problems include:
Painting over damp walls.
Poor surface preparation.
Insufficient sanding.
Using an unsuitable primer.
Ignoring manufacturer drying times.
Applying excessively thick coats.
Poor protection of completed finishes.
Selecting colors without reviewing real samples.
Whenever possible, approve a physical paint sample or mock-up under the actual project lighting before applying the color throughout the villa.
Simplified Painting Sequence
A typical sequence can be summarized as:
Plaster Inspection → Repairs → Surface Preparation → Putty/Filler → Sanding → Primer → First Paint Coat → Corrections → Final Coat → Inspection
The exact system should always follow the project specification and selected paint manufacturer's instructions.
Conclusion
High-quality wall painting starts with a properly prepared substrate.
Putty, sanding, primer and intermediate inspections are just as important as the final color. Proper sequencing and suitable products help produce smoother walls, more consistent finishes and better long-term paint performance.
References
Sherwin-Williams — Interior Paint How-To: https://www.sherwin-williams.com/homeowners/how-to/painting/interior-painting-how-tos
Benjamin Moore — How to Paint a Wall: https://www.benjaminmoore.com/en-us/interior-exterior-paints-stains/how-to-advice/interiors/paint-a-wall
Dulux — Painting and Decorating Advice: https://www.dulux.co.uk/en/decorating-tips-and-advice
Jotun — Interior Paints: https://www.jotun.com/ww-en/decorative/interior
Related articles

Key Construction Project Terms: Design, Pricing and Execution
Construction projects use a wide range of technical and commercial terms. This practical glossary explains common terminology used in design, tendering, pricing, contracting and site execution.
Read article →
Plastering Works in Residential Construction: Key Steps and Quality Checks
Plastering transforms unfinished blockwork into level surfaces ready for paint, tiles and other finishes. This guide explains the main plastering stages, preparation requirements and common quality issues in residential construction.
Read article →
Flooring Installation: Materials, Grout Joints and Floor Profiles
Proper flooring installation depends on more than the selected tile or stone. This guide explains substrate preparation, adhesives, grout, spacers, leveling systems, movement joints and transition profiles used in residential flooring.
Read article →